No one is born a brilliant photographer. Sure, some people seem to have a knack for finding the perfect lighting and composition, but unless they use certain techniques they also only have a 50/50 chance of the shots they’ve taken, turning out the way they want them to. The most important thing you can do before attempting to take your first photograph, is figure out where all the buttons and dials on your camera are, and familiarise yourself with what they do (which can be a lot of fun and result in some rather interesting pictures).
")
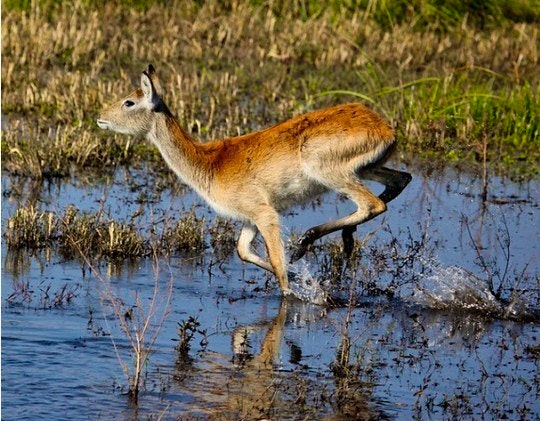
Below are a few tips and tricks to help you try and capture moving objects without blurring them into obscurity on a digital camera. No method is foolproof, so feel free to adapt and remix these to find what works best for you:
- First, pick your subject. Are you wanting to capture them indoors or outdoors? If indoors, open the blinds and curtains to let in as much natural light as possible, if outdoors ensure that it’s not too overcast.
- Now that you know who or what you’re photographing, watch closely. How are they moving? Side-to-side? Walking? Crawling? Leaping?
- Turn off any auto-focus you may have – you want to predict where you subject will be when you take the photo, and the auto-focus is slower and reactive only.
- Turn off any auto-focus you may have – you want to predict where you subject will be when you take the photo, and the auto-focus is slower and reactive only.
- In the camera’s settings if applicable, turn it onto the fastest shutter speed. Changing the ISO speed to the highest setting also shortens the amount of time the camera needs to capture the photo. 1/100 of a second or faster is generally considered the best. You can also try setting the ISO to 400.
")
- If you don’t have the above options, you should have “burst mode”, where you only shoot once and the camera then takes three pictures in short succession. Turn this on, as generally one out of the three pictures taken should be useable.
- The picture you take will be grainier than usual, due to less light reaching the shutter, so if you’re taking pictures at night, ensure your flash is on, and you have a spare battery for it.
- Now that you’ve prepped your camera, chosen your subject and know the direction the they are going, you will have some time to pick a spot ahead of them to try and photograph them as they pass it. Are you going to wait till the subject is 100m ahead or 10m?
- Take one or two experimental shots – were you as accurate as you thought? Do you need to adjust the focus a bit? Do you need to move closer, or farther out?
- If you’re trying to get a specific pose for children or pets, you’ll soon find out how frustrating it can be. Your best bet is to distract them with toys, play with them for a bit, and then try and take a photo. Repeat this step until you get the shot you want. That old adage, patience is a virtue is certainly applicable for these situations.
- Follow the subject with the camera for about 0.5 seconds after you’ve taken the photo to ensure you’ve captured the subject properly. The background may blur a bit, but the subject will remain in focus.
Congratulations! If you follow the above tips (feel free to tweak them to suite your style and camera), you should now feel more confident when shooting a moving subject. These tips also work well for shots of water, athletes and stills of people on the street. Have your own tips or list on how to take action photo’s? Feel free to share them with us below in the comments.
Main image credited to Steve Jurvetson (Creative Comons)